Quick Start Guide
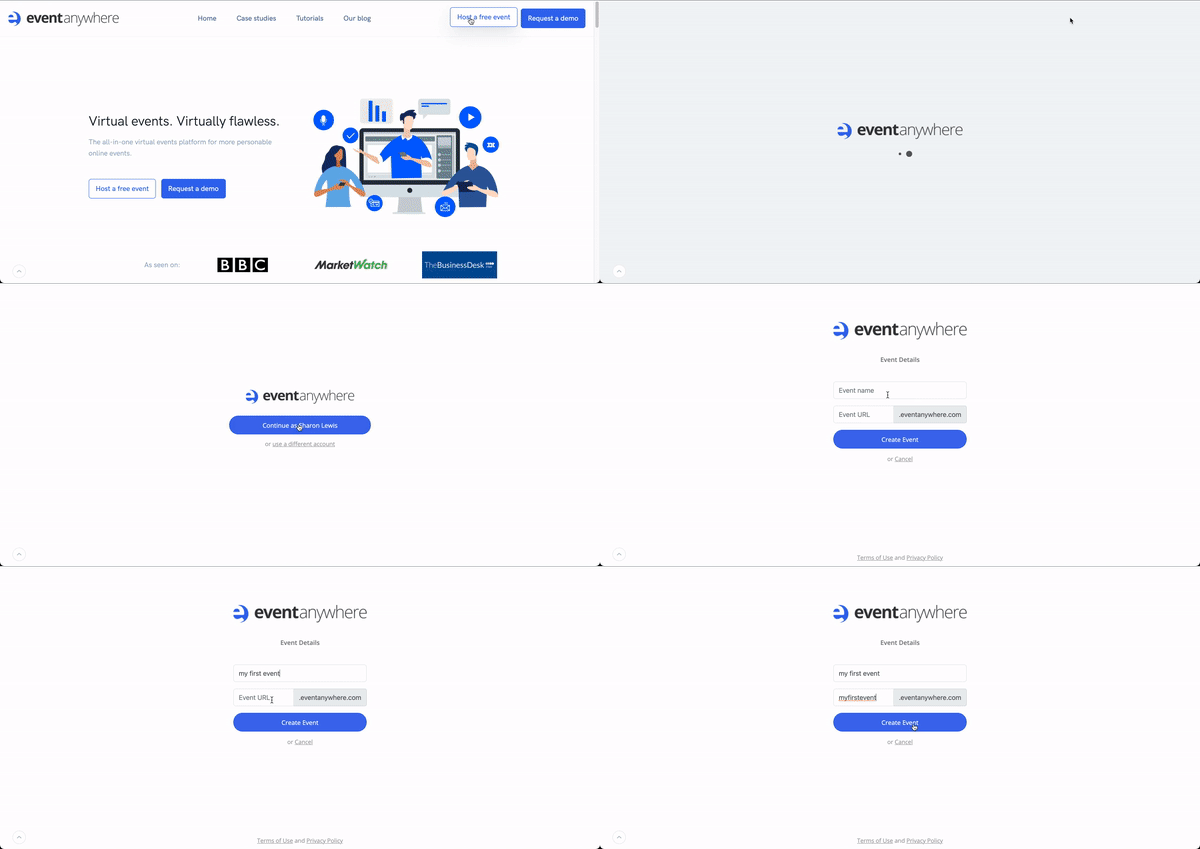
Create an event site
- Click the Host a Free Event to create an event site.
- In the Event details section, add the Event name and Event URL.
- Click the Create Event button.
Your very first event is created.
Create a Schedule
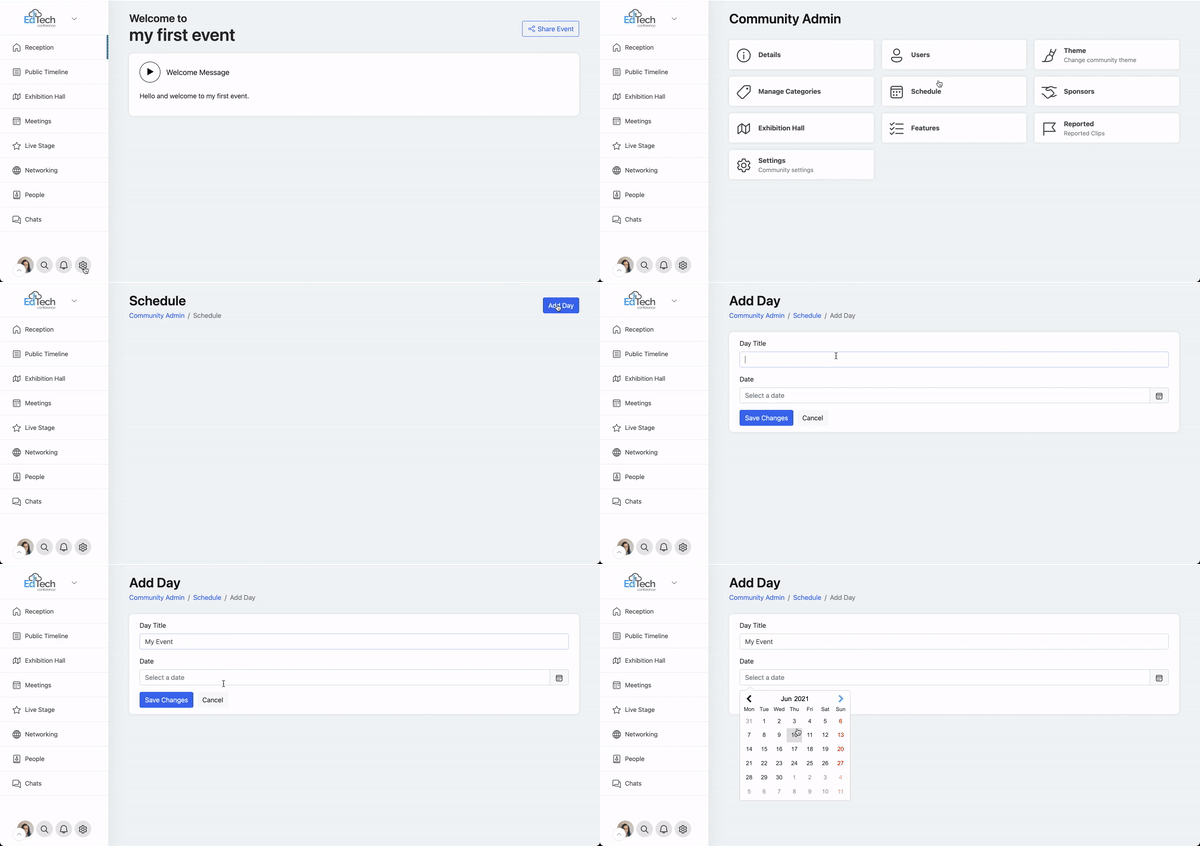
To add a schedule for your event on the welcome page:
- Navigate to the Community Admin.
- Click on Schedule and then click Add A Day.
- Include a title for your event in the Day Title field.
- Select the date from the Date dropdown list.
- Click Save Changes.
You can now begin adding sessions to your schedule.
Expo hall setup
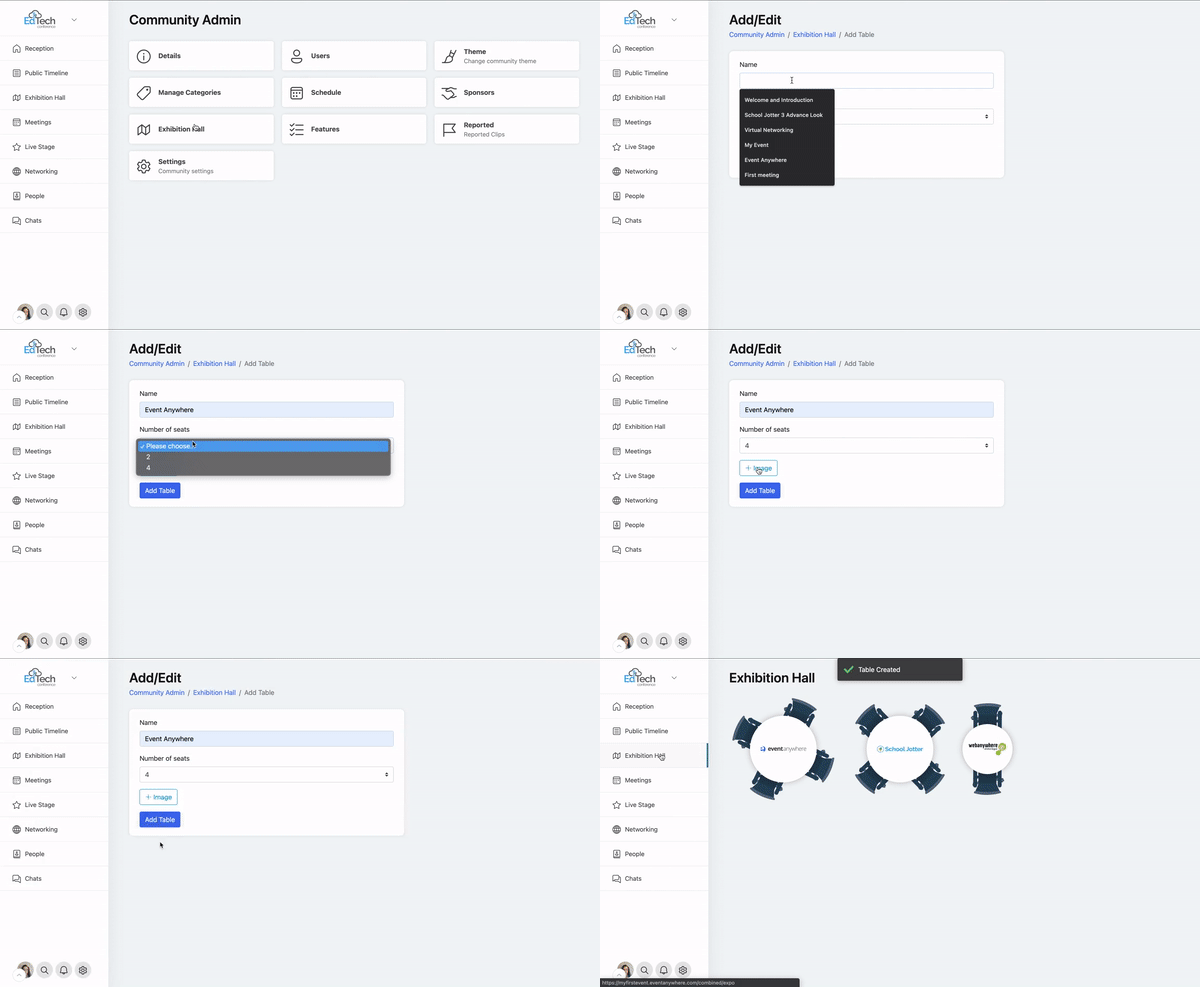
Adding Exhibition Hall on Event Anywhere is fairly easy.
- Navigate to Community Admin.
- Click Exhibition Hall.
- On the top right hand corner, click Add Table.
- Enter a name for your table in the Table Name field.
- Select the number of seats from the dropdown list.
- If you would like to add an image, you can click the Image button and select an image from the web or from your local system.
- Click the Add Table button.
- Navigate to the Exhibition Hall page and you will see a table has been created.
Invite attendees
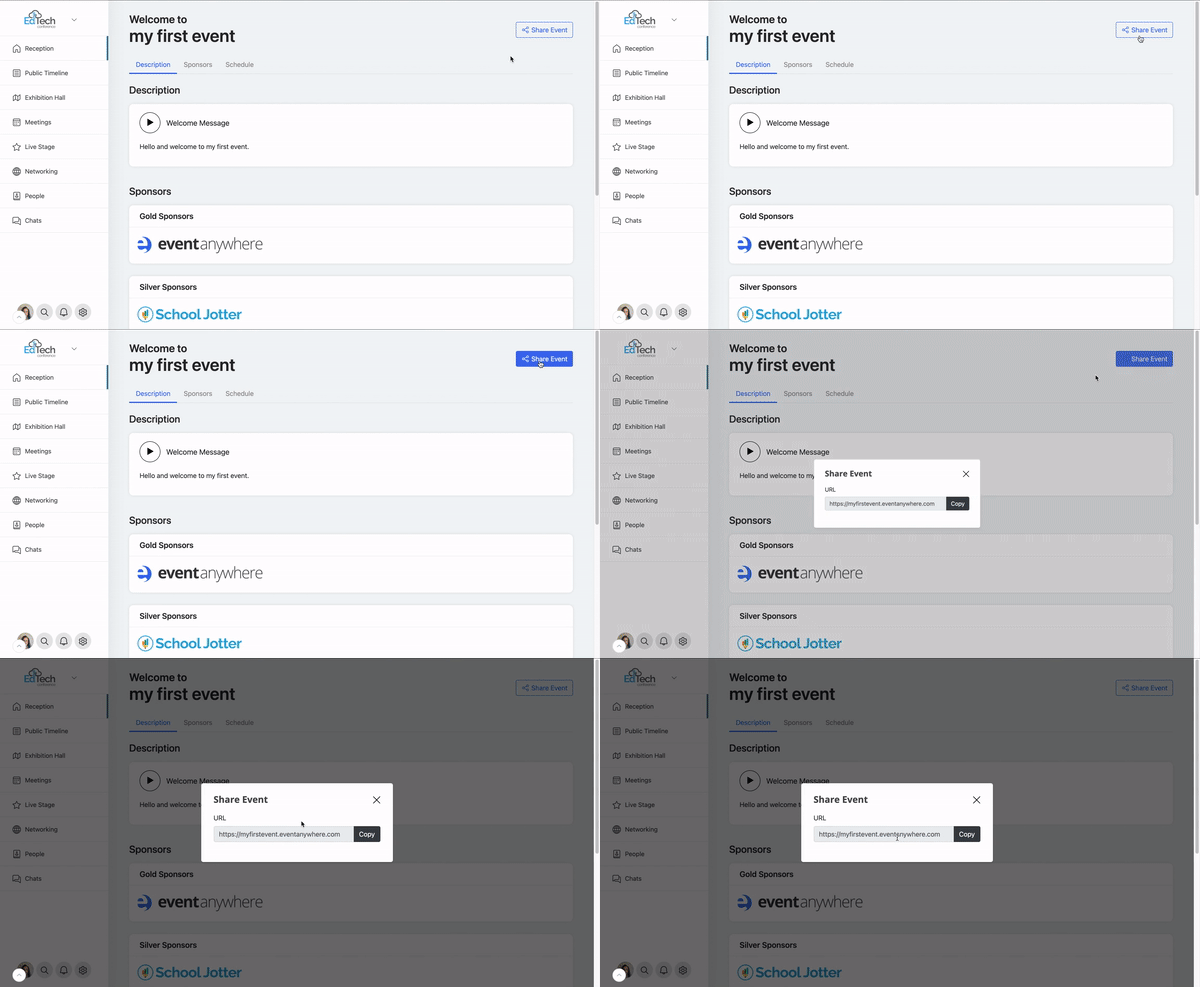
Once you have set up your event, it’s time for you to start inviting the attendees who would be interested in your event. To invite attendees:
- On your event page, click the Share Event button.
- Copy and paste the Event URL in an email or any of your social media platforms. People who click on the URL will be invited to create an account with Eventanywhere.
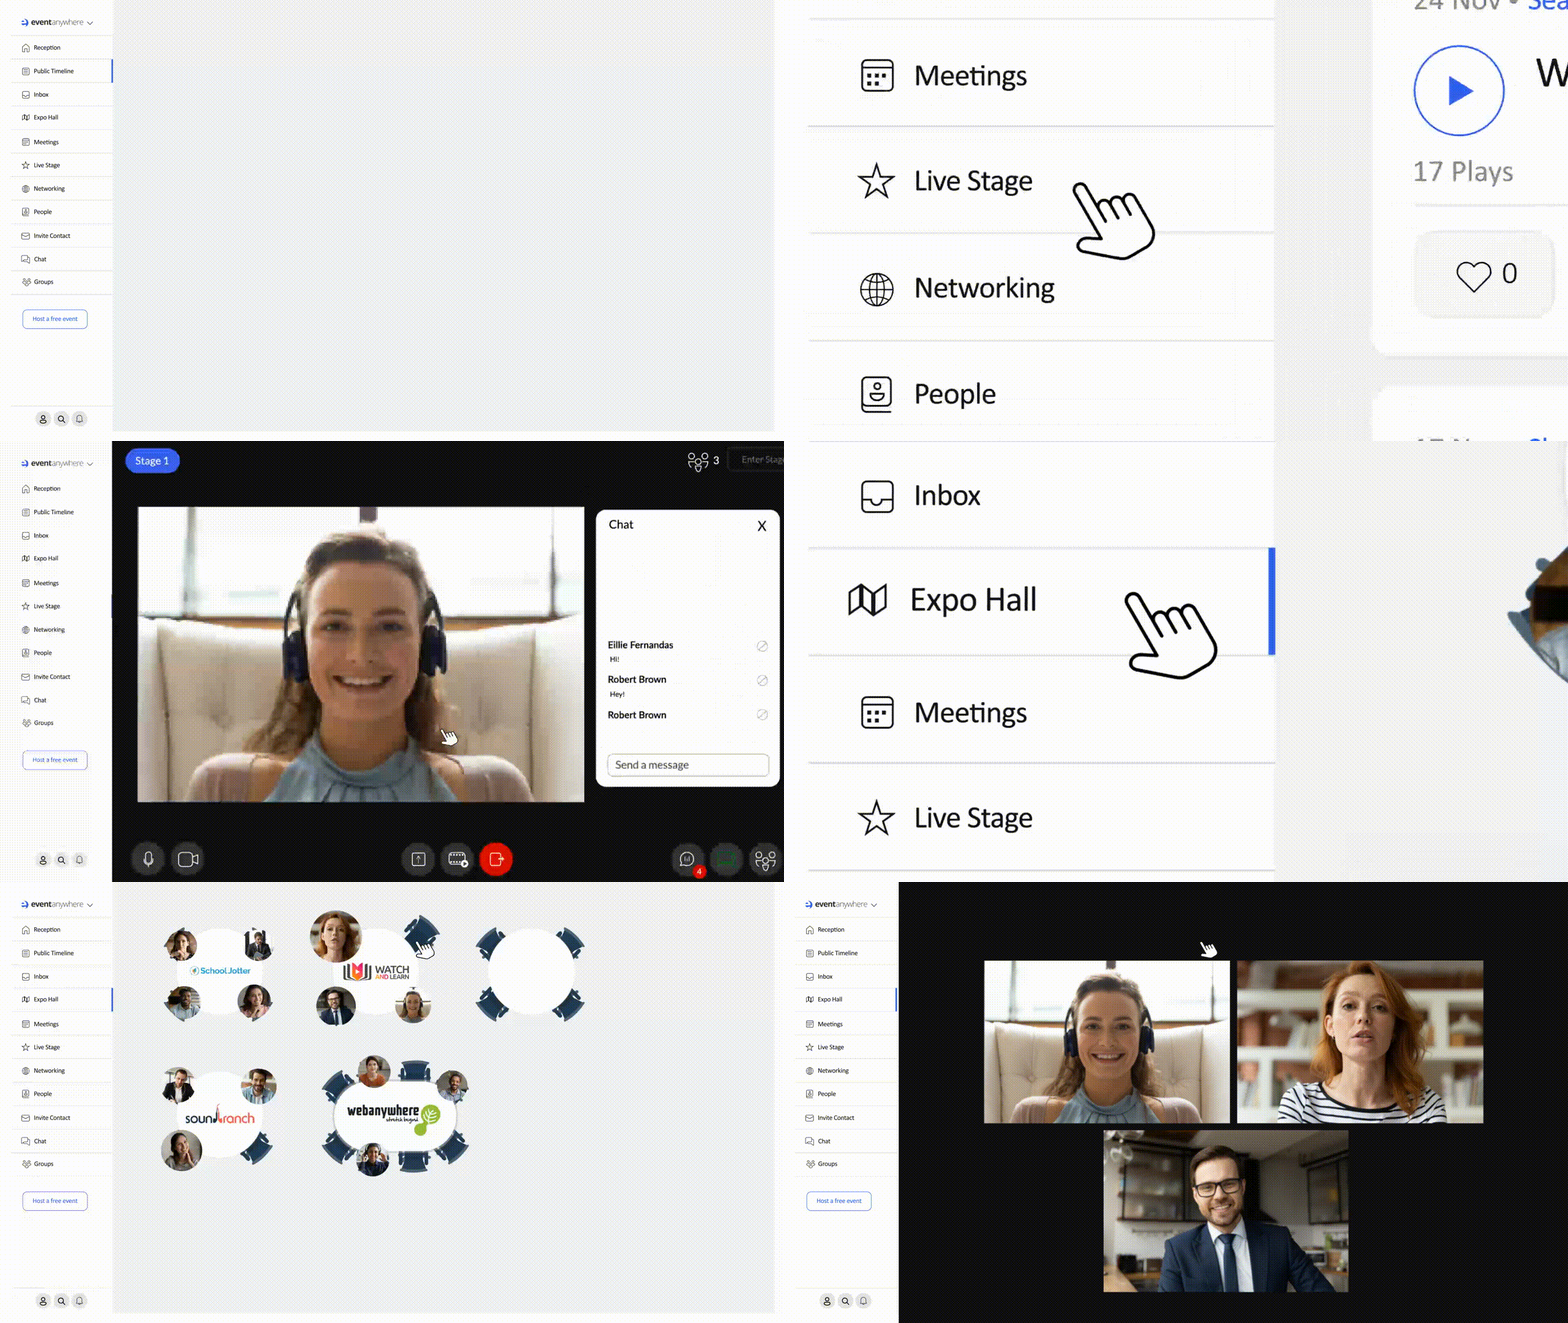
Live Stage
From the Live stage, you can see what event is happening, who is the speaker, what are the chats displayed, share your screen, or present any videos.
To access the Live stage,
- Click Live Stage from the left hand panel.
- Click Join as Presenter.